This article was written by Hiyoung
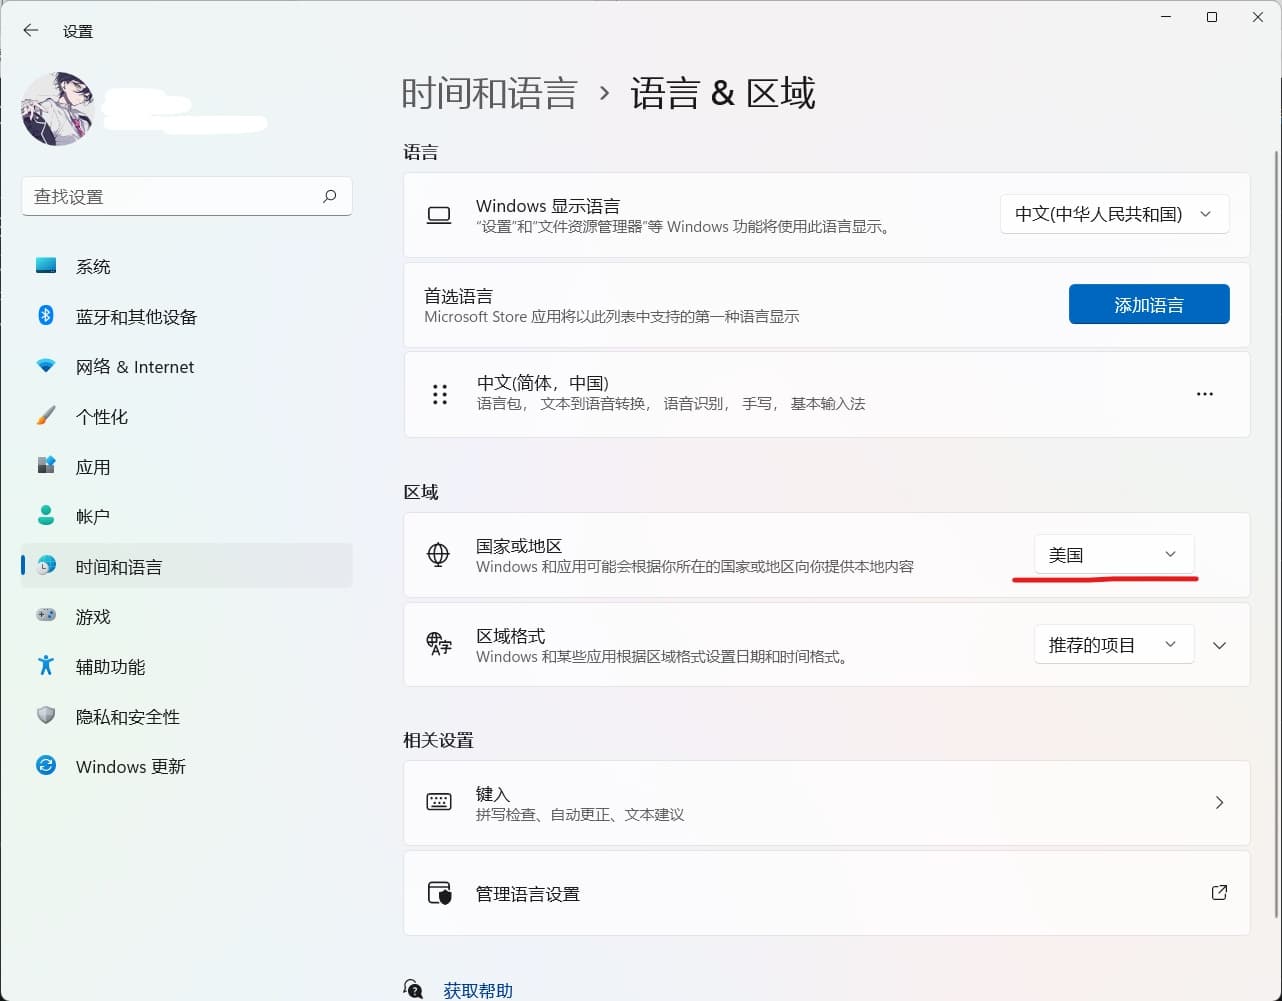
Prerequisites: Windows 11 Pro or higher, set system region to United States.
In Settings -> Apps -> Optional features -> More Windows features, check ‘Virtual Machine Platform’, then restart your system.

Next, download the installation package. Link: https://pan.baidu.com/s/1215GlKeDCHcbE0I2SgtWLg Extraction code: frkx
After downloading, you’ll see two files: one is the Android Subsystem installer, the other is the WSA Toolbox used for installing APK files.
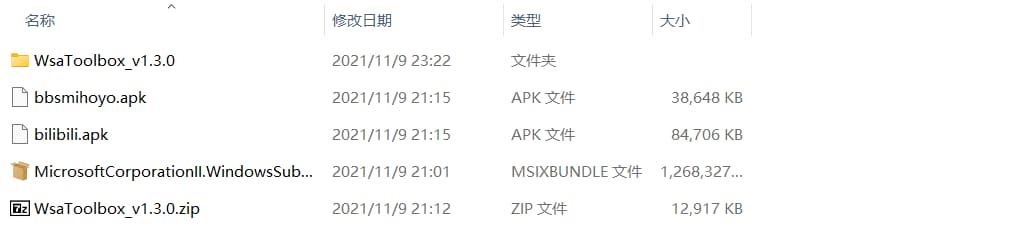
The two files at the bottom.
Now, open Windows PowerShell as an administrator.
Run the command: add-appxpackage followed by a space, then the full path to the Android Subsystem installation file. (Crucial: ensure there’s a space between add-appxpackage and the file path).

If you see the above, it means the installation was successful.
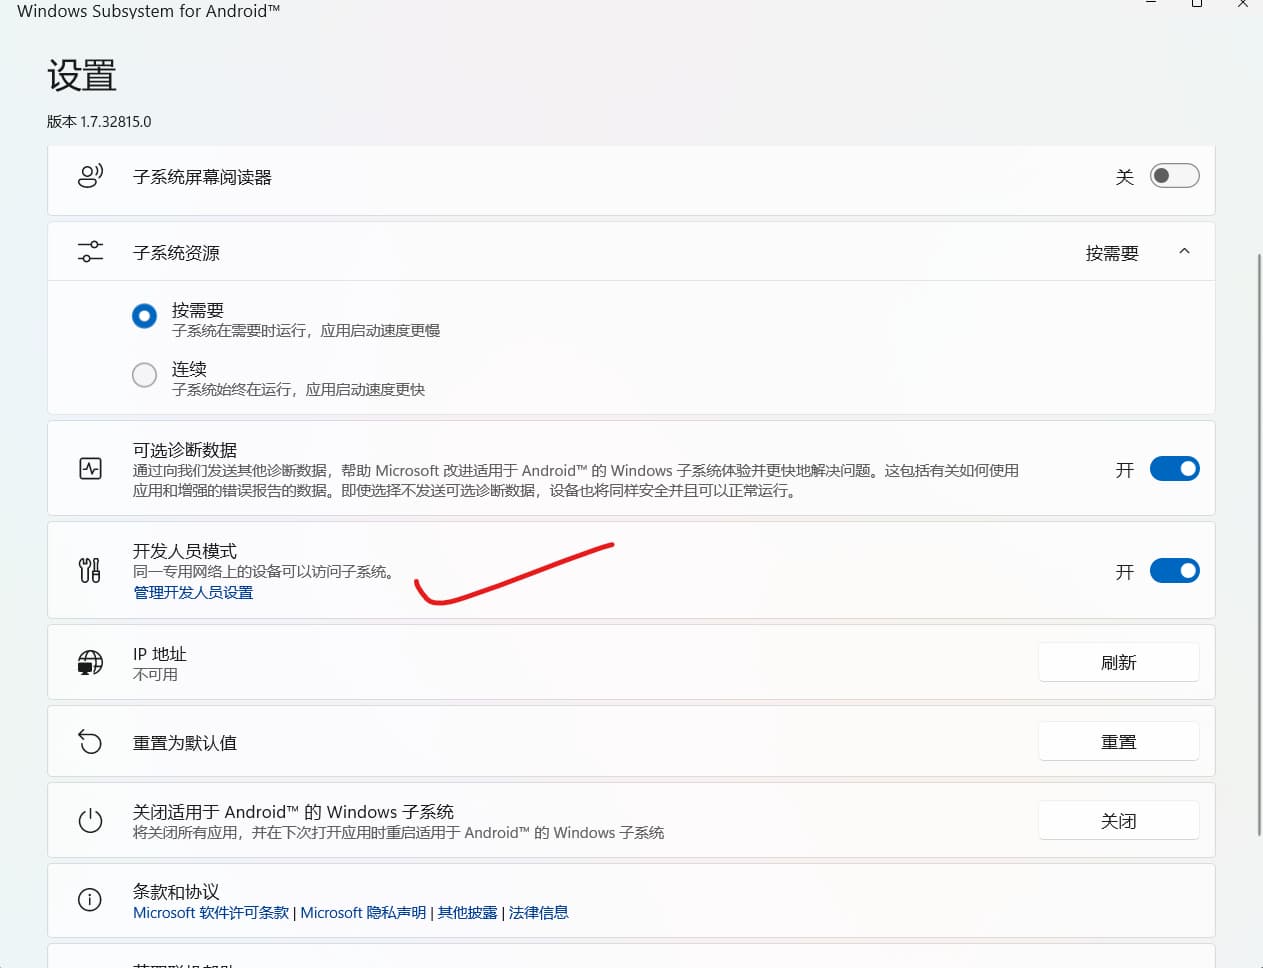
You’ll then see the installed Android Subsystem in the Start menu. Click to run it and enable Developer mode.
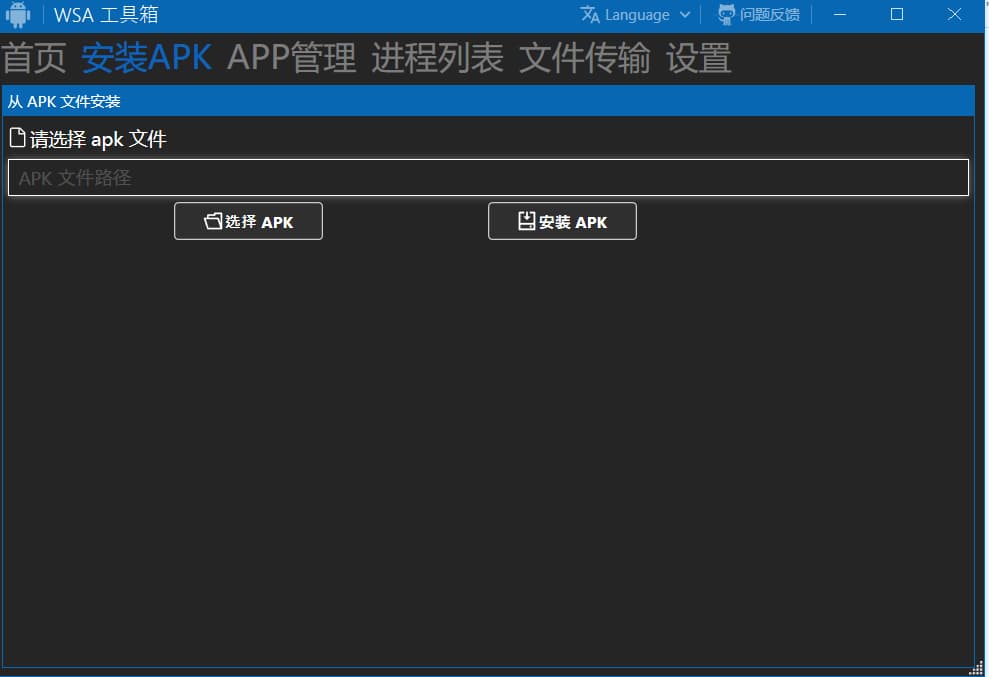
Unzip and run the other ZIP file to install APKs.
Installation is now complete.
The following content was added by yexca
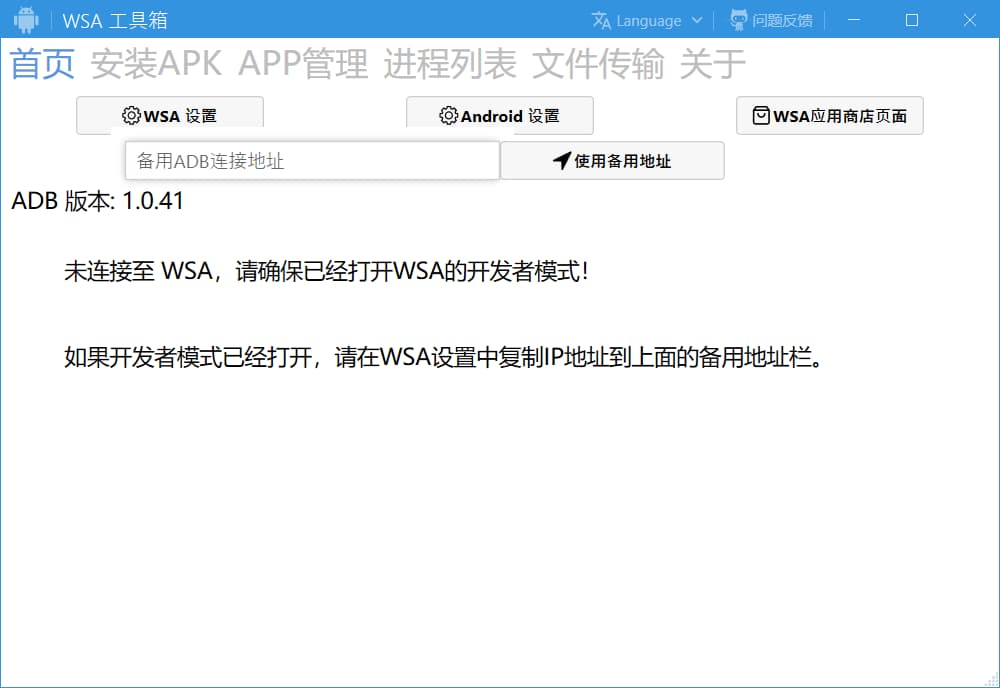
If the toolbox fails to install or you see the situation below, open the Subsystem settings, enable the first option “Files”, then try opening the toolbox again.
- Get File Path
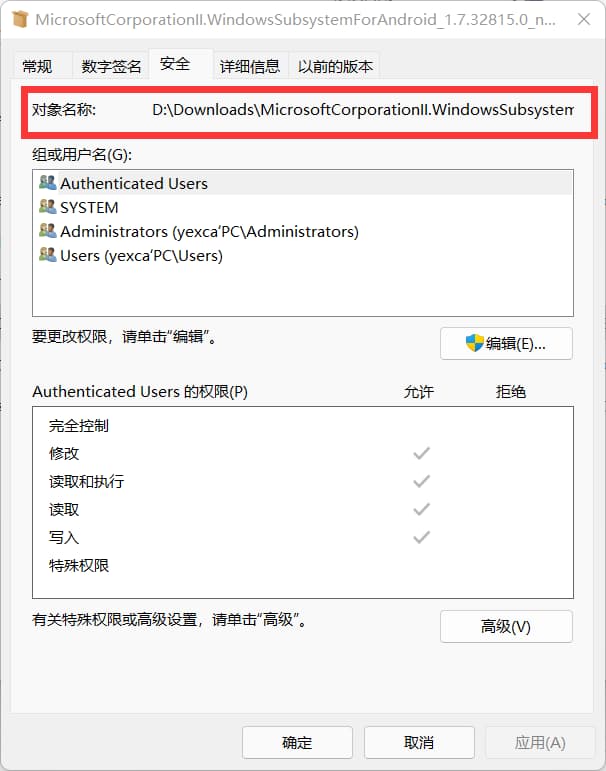
Right-click the file, select “Properties” -> “Security”, the first line “Object name” is the file path.
- WSA Toolbox