📢 This article was translated by gemini-2.5-flash
This article was written by Hiyoung
Original article: https://blog.hiyoung.icu/2022/08/18/5be9517606f2/
Batch Process Images with Photoshop Automation Scripts
- Click Window -> Actions in the menu bar (Shortcut: Alt+F9).
- At the bottom of the tab, click ‘Create New Set’ (New Folder), name it ‘Resize Images’ (you can rename it yourself).
- Then click ‘Create New Action’ next to it. You’ll see the record button at the bottom turn red.
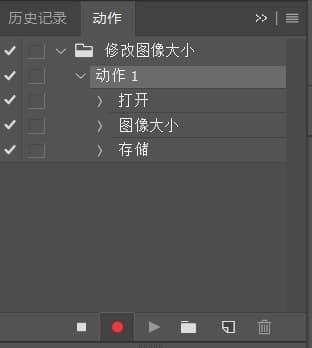
- Click File > Open, open one of the images you want to process, modify its size, then click OK. Then ‘Save As’, give it a name, and save. (Do NOT use ‘Export’, otherwise the action won’t record correctly, leading to an infinite loop.)
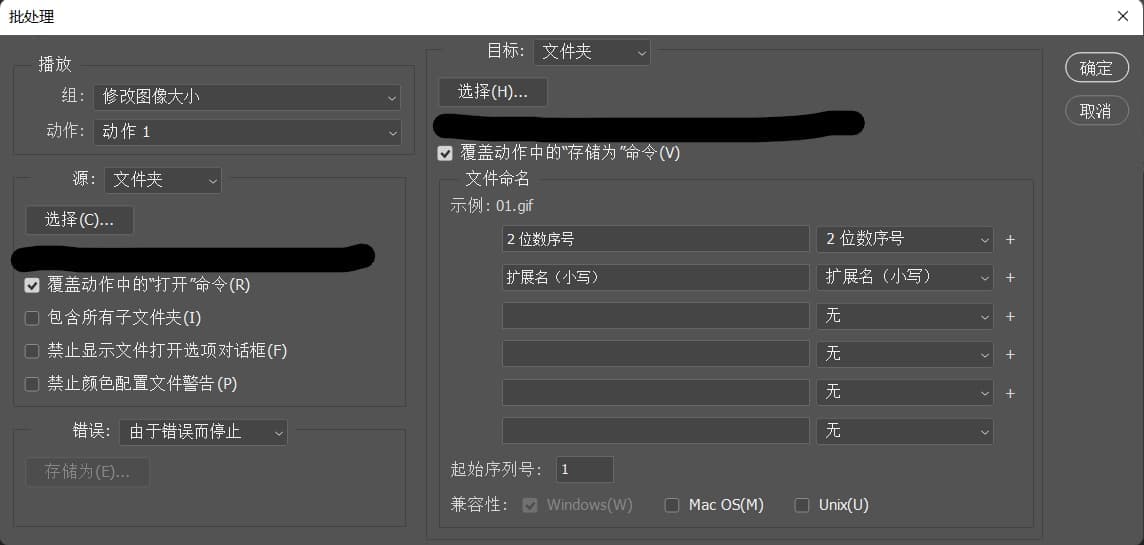
- Click File > Automate > Batch.
- Settings:
- Under ‘Play’, select the ‘Set’ and ‘Action’.
- Under ‘Source’, select the folder containing the images to modify.
- Under ‘Destination’, select the folder to save the modified images.
- Check ‘Override Action “Open” Commands’ and ‘Override Action “Save As” Commands’.
Content partially referenced from the internet.